Repeating dots on printed pages are one of the most useful defects for service diagnosis. Random spots can come from dust, paper, handling, or contamination. Repeated dots are different. They usually mean that one rotating part inside the printer or copier is leaving the same mark again and again.
For service engineers, the first rule is simple: do not only look at the defect. Measure it.
When the same dot, scratch, stain, or mark appears at a regular interval down the page, the distance between the marks can help identify the component that caused it. This is especially important for companies working with compatible toner cartridges, copier fleets, and B2B service accounts, where a wrong diagnosis can lead to unnecessary cartridge returns.
Why Defect Distance Matters
A repeated mark normally follows the circumference of a rotating part. The source may be the OPC drum, primary charge roller, developer roller, transfer roller, fuser sleeve, or pressure roller.
If the distance matches the drum, the toner cartridge may be responsible. If the distance matches the fuser, the cartridge may not be the cause at all. For a toner cartridge supplier, this distinction is critical. A customer may blame a compatible toner cartridge when the real problem is a worn fuser, contaminated transfer roller, or damaged machine component.
This is why defect distance charts are useful in service work. They help move the conversation from “the cartridge is bad” to “which part is creating this pattern?”
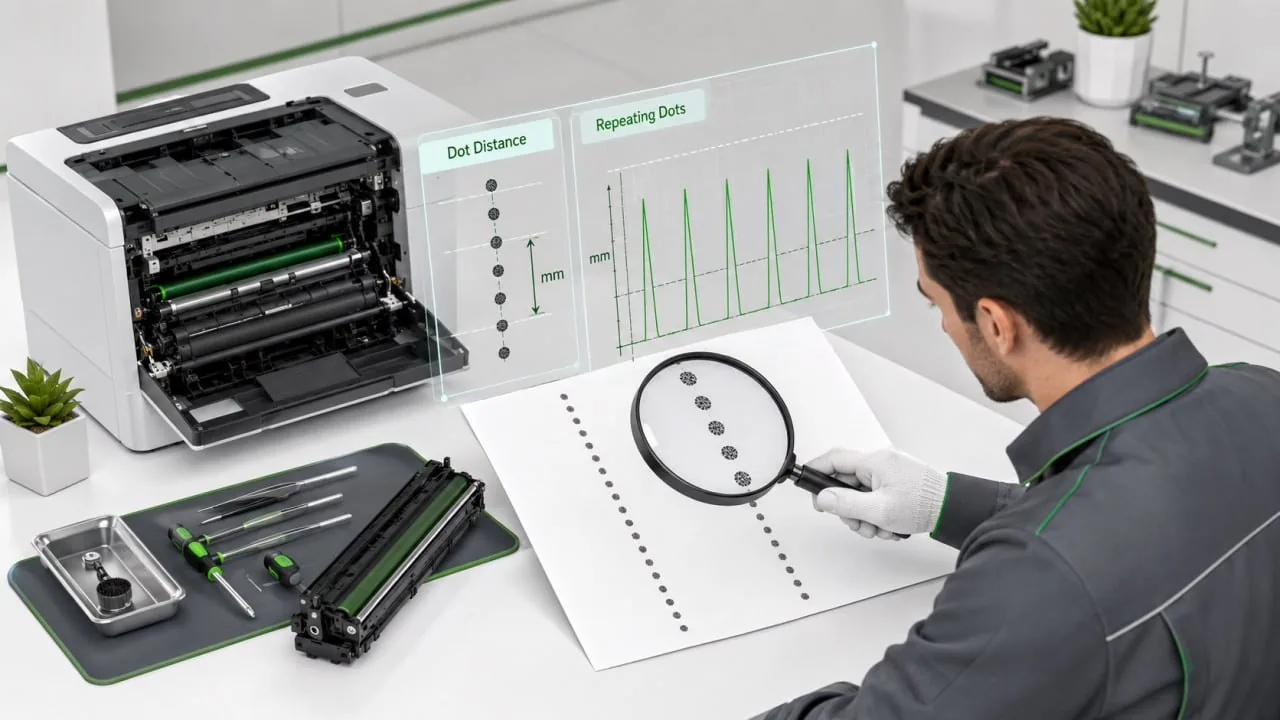
How to Measure Repeating Dots
Print a page where the dots are clearly visible. Then measure from the center of one dot to the center of the next matching dot in the paper feed direction.
Do not measure across the page. Measure vertically, following the direction the paper moved through the machine.
After that, compare the distance with the service manual or known component circumference for that model.
Common checks include:
- OPC drum: repeated black dots, scratches, missing image spots;
- PCR roller: gray charge marks or background spots;
- developer roller: uneven density or repeated toner marks;
- transfer roller: weak image transfer or repeated transfer defects;
- fuser sleeve: shiny marks, smearing, offset, or hot spots.
The exact distance depends on the printer or copier model, so service documentation is always useful. But even a simple measurement can narrow the search quickly.
OPC Drum Defects
The OPC drum is one of the most common causes of repeating dots on printed pages.
If the drum surface is scratched, dented, contaminated, or worn, the mark can repeat every time the drum turns. These defects are often sharp and easy to recognize.
Typical signs include:
- clear black dots;
- repeated scratches;
- small missing image areas;
- marks in the same position on every page;
- toner buildup on one area of the drum;
- defects that appear immediately after cartridge installation.
For compatible toner cartridge inspection, the drum should be checked under good light. Do not touch the drum surface with fingers. Look for scratches, dents, coating damage, or toner stuck to one area.
If the defect distance matches the drum and the mark is visible on the drum surface, the cartridge should be replaced or investigated by the factory.
PCR and Charge-Related Marks
The primary charge roller controls the electrical charge on the drum. If it is dirty, damaged, or uneven, it can create repeated charge marks.
PCR-related dots may look softer than drum scratches. They may appear gray rather than deep black. In some cases, they can also create backgrounding or unstable density.
Humidity can make these symptoms worse, especially if toner powder behavior is also affected by moisture.
If repeated dots appear together with gray background or excess toner inside the machine, the issue may connect with high waste toner in copier fleets. Poor charging and poor transfer can increase toner loss and create more waste toner.
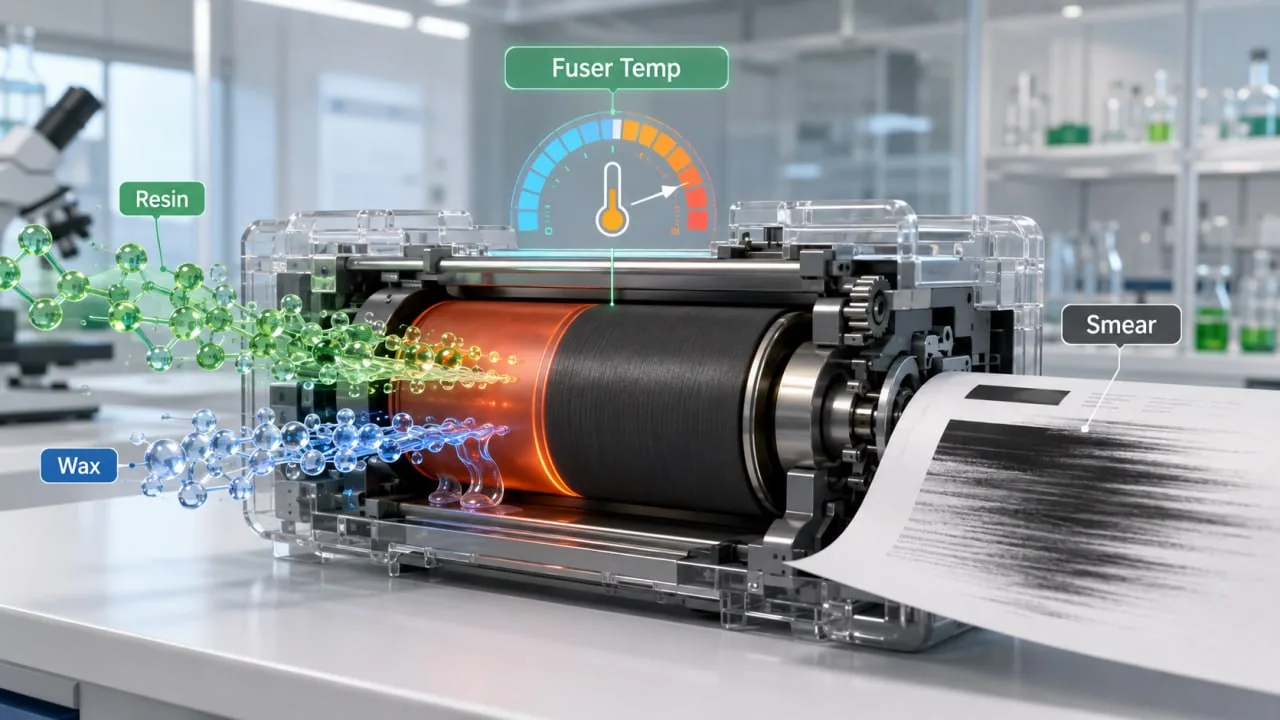
Fuser-Related Repeating Dots
If the dots look shiny, smeared, flattened, or slightly burned into the page, the fuser should be checked.
A damaged fuser sleeve or pressure roller can pick up toner and redeposit it at a regular interval. This may create repeated marks, toner offset, or smearing after the page exits the machine.
Fuser-related problems often appear with:
- toner offset;
- smearing after fusing;
- glossy or hot-looking marks;
- repeated stains after heavy coverage printing;
- defects that become worse when the machine is warm.
If the repeated dots appear together with poor toner adhesion, read toner smearing after fusing and why toner rubs off the page. In that case, the root cause may be fuser temperature, paper, resin, wax, or formula compatibility.
Cartridge Fault or Machine Fault?
Not every repeated dot is a cartridge problem.
The fastest practical test is to move the cartridge to another compatible machine, if possible. If the defect follows the cartridge, the cartridge should be investigated. If the defect stays with the machine, the problem is likely inside the printer or copier.
Service engineers should check:
- whether another cartridge creates the same defect in the same machine;
- whether the same cartridge creates the defect in another machine;
- whether the fuser has visible damage;
- whether the transfer roller is dirty or worn;
- whether paper dust is collecting inside the machine;
- whether the defect appears only after duplex or heavy coverage printing.
This simple test protects both the customer and the supplier. It also helps a toner cartridge manufacturer collect better complaint evidence instead of receiving only unclear photos.
What Evidence Should Be Sent to the Supplier?
For B2B toner service, useful evidence includes:
- printer or copier model;
- cartridge model and batch number;
- defect distance measurement;
- photos of the full page;
- close-up photo of the repeated mark;
- page count when the issue appeared;
- paper type and storage condition;
- whether the defect follows the cartridge to another machine.
This level of information helps a premium toner cartridges program behave professionally. The supplier can identify whether the root cause is component damage, toner powder contamination, transfer failure, fuser offset, or machine wear.
It also prevents a common problem in B2B supply: replacing cartridges without understanding why the defect happened.
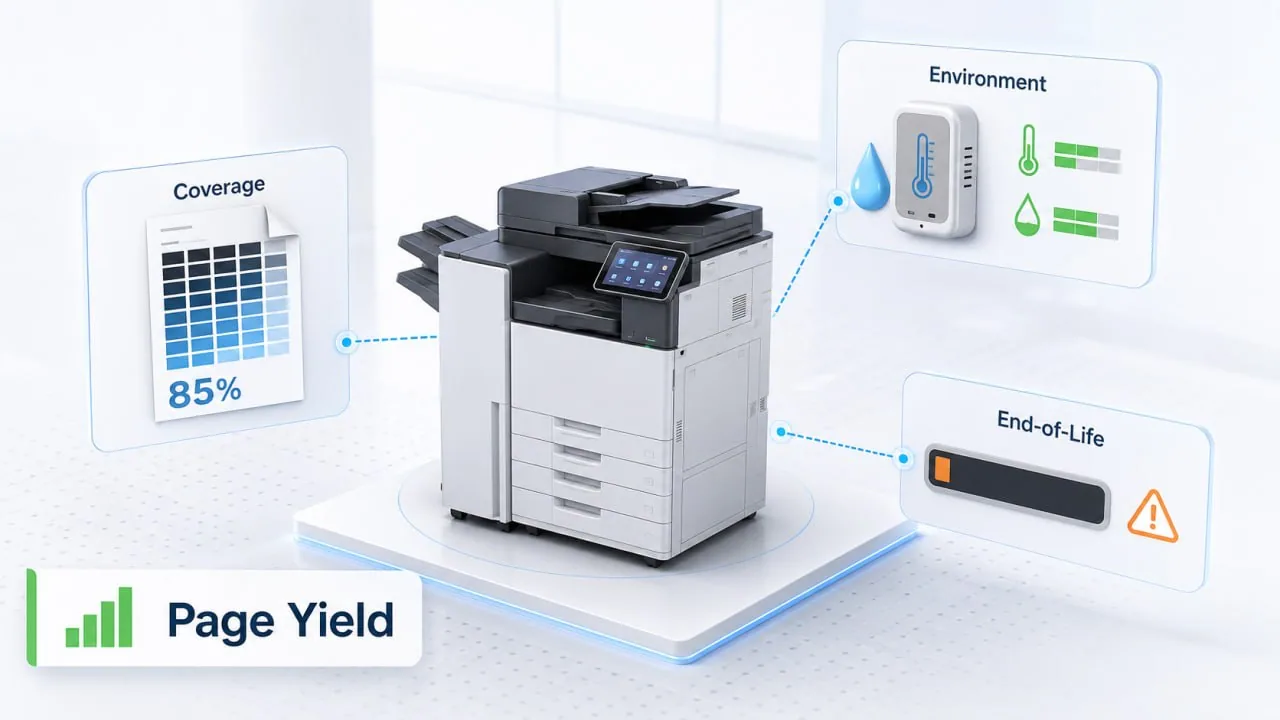
Why This Matters for Copier Fleets
In copier fleets, one cartridge model may be used across many machines. If only one machine shows repeating dots, the cause is probably machine-side. If the same defect follows several cartridges from one batch, the supplier should investigate the batch.
This distinction matters for cost control.
Unnecessary returns hurt the supplier. Unresolved machine faults hurt the customer. Poor diagnosis hurts everyone.
A good service process should connect print defect evidence with batch control, machine condition, and customer usage. This is also important when analyzing low page yield in B2B fleets, because defects, waste toner, and yield complaints often appear together.
FAQ
What causes repeating dots on printed pages?
Repeating dots are usually caused by a rotating component such as the OPC drum, PCR roller, developer roller, transfer roller, fuser sleeve, or pressure roller.
Can a compatible toner cartridge cause repeated dots?
Yes. If the drum or internal roller is scratched, contaminated, or damaged, a compatible toner cartridge can create repeated dots on printed pages.
How do service engineers diagnose the problem?
They measure the distance between repeated marks, compare it with component circumferences, and test whether the defect follows the cartridge or stays with the machine.
Should the cartridge always be replaced?
No. First confirm whether the defect belongs to the cartridge or the machine. This avoids unnecessary replacement and helps identify the real fault.
Final Thoughts
Repeating dots on printed pages should be treated as measurable evidence, not just a visual complaint.
A defect distance chart helps service engineers move from guesswork to diagnosis. It shows whether the likely source is the toner cartridge, drum, charge roller, transfer system, or fuser.
For distributors, service companies, and B2B buyers, this reduces unnecessary returns, improves technical communication, and protects customer trust.
A reliable toner cartridge supplier should support this process with batch traceability, component knowledge, and practical service guidance.
Related reading: toner smearing after fusing, toner rubs off the page, high waste toner in copier fleets, compatible toner gray background, ghosting after installing a new toner cartridge, low page yield in B2B fleets.