
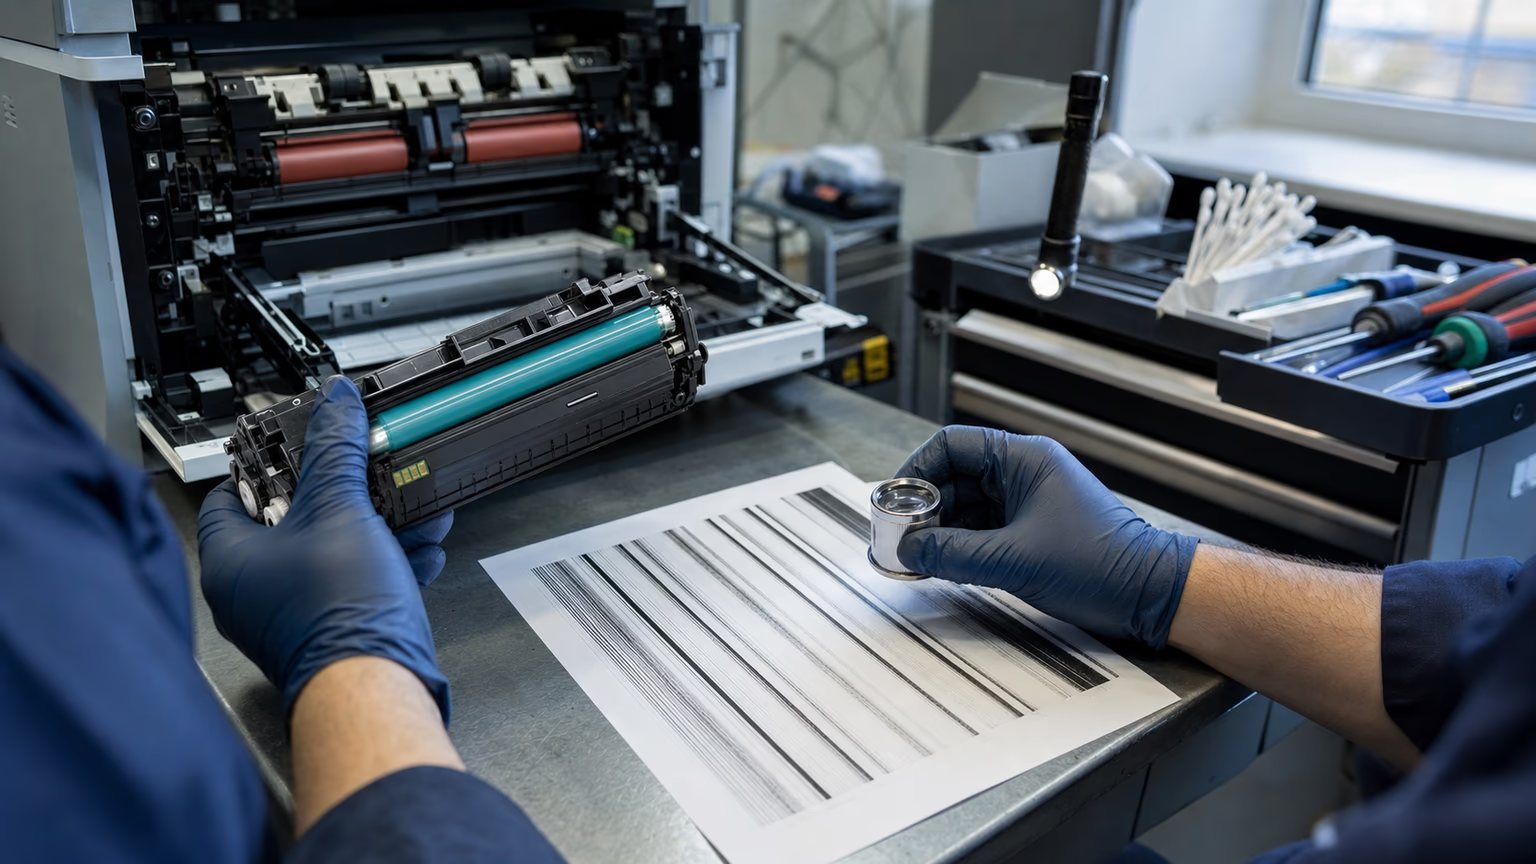
Why Most Cartridge Defects Are Not Cartridge Problems
B2B printer service teams often hear the same complaint: the customer replaced the toner cartridge and the print quality problem did not go away.
In many cases, the original cartridge was not faulty at all.
Print defects such as streaks, smears, ghosting, or repetitive marks can originate from worn fuser units, contaminated rollers, failing transfer belts, or dirty laser optics.
When technicians default to swapping the cartridge, they treat the symptom rather than the cause, and the same problem returns on the next print job.
Learning to separate cartridge defects from printer maintenance problems is a core skill for any service organization that wants to reduce waste and protect margins.
Misdiagnosis often happens because cartridge replacement is fast and seemingly low risk.
A technician carries a spare cartridge, so it is easy to pop in a new one and see if the issue clears.
If the defect persists, the technician then moves on to other components.
This trial-and-error approach consumes valuable service time, creates unnecessary cartridge usage, and frustrates customers who see no improvement after paying for a replacement.
The first step toward accurate diagnosis is to accept that not every print quality problem begins inside the cartridge.
A significant share of issues stems from the printer itself, especially in high-volume fleets where maintenance cycles are stretched thin.
Environmental factors also play a role.
High humidity, dust, or paper debris can cause transfer or fusing defects that mimic cartridge failures.
Low-quality or damaged paper can leave residue on rollers, leading to smears that persist regardless of how many new cartridges are installed.
Before blaming the cartridge, service providers should always consider the age and condition of the printer, its recent maintenance history, and the operating environment.
A cartridge that works perfectly in one machine may fail to produce acceptable output in another if that machine has a weak drum ground, a worn fuser, or a dirty charge roller.
This is why a systematic diagnostic approach is essential for any B2B operation managing multiple printer models and mixed fleets of OEM and compatible cartridges.
The Hidden Cost of Guessing in Printer Fleet Maintenance
Guessing wrong between a cartridge fault and a maintenance issue carries real financial consequences for B2B distributors, managed print service providers, and their clients.
Every unnecessary cartridge replacement adds direct cost to the service contract or customer invoice.
When those cartridges are returned as defective, the distributor incurs logistics, inspection, and restocking expenses.
If the return is contested by the cartridge supplier because the unit was actually functional, the relationship suffers and the distributor may lose credit.
Beyond the immediate cost, the customer experiences downtime from repeated service visits, and the service provider must absorb the labor cost of trips that did not resolve the problem.
Repeat service calls also erode customer confidence.
A procurement manager who sees the same print quality issue after three cartridge swaps will begin to question the competence of the service team.
In managed print environments, service level agreements often include penalties for excessive downtime or failure to achieve first-time fix targets.
Misdiagnosis directly undermines first-time fix rates, which are a key performance indicator for any MPS operator.
The cost is not limited to the single incident; it compounds over time as dissatisfied customers consider alternative suppliers or reduce their contract scope.
Consider the impact on cartridge inventory.
If a service organization develops a habit of replacing cartridges first, it will over-purchase toner and drum units based on inflated consumption.
Warehouses fill with cartridges that were never truly needed, tying up working capital.
In contrast, a disciplined diagnostic approach reduces replacement rates, lowers return logistics, and allows procurement teams to buy based on actual demand rather than fear.
The few minutes spent on proper triage can save hundreds of dollars per incident and preserve long-term customer relationships.
- Unnecessary cartridge replacements increase direct spend and return processing costs.
- Repeat service visits drain technician labor hours and lower contract profitability.
- Failure to achieve first-time fix rates can trigger SLA penalties and contract reviews.
- Customer trust declines when issues persist after multiple cartridge changes.
- Over-purchasing cartridges based on false defect rates creates excess inventory and cash flow pressure.
Reading the Defect: A Visual Guide to Print Quality Symptoms
The printed page is a diagnostic map.
Each type of print defect has a characteristic appearance that points toward a specific component.
By learning to read these patterns, technicians can quickly narrow down the possible causes.
The first step is to print a known test page, preferably one that includes solid areas, halftones, and text.
Examine the output under good lighting, and if possible, use a magnifying glass or loupe to inspect fine details.
Compare the defect pattern to the known geometry of the printer: the circumference of the drum, fuser roller, transfer roller, and charge roller.
Repetitive marks that appear at regular intervals correspond to the circumference of a rotating component.
For example, a mark that repeats every 94 mm may be from the drum, while a mark repeating every 75 mm may be from the fuser.
Repeating Marks and Defects
If a defect appears periodically down the page, measure the distance between occurrences.
Each rotating component has a specific circumference.
A drum circumference is often around 94 mm, a charge roller around 37 mm, a transfer roller around 50 mm, and a fuser roller around 75 mm, depending on the printer model.
Once you know the repeat interval, cross-reference it with the service manual or a component circumference chart.
A repeating defect that aligns with the drum circumference points to drum damage, not a toner issue.
If the interval matches the fuser, inspect the fuser sleeve for damage or toner buildup.
This single measurement can save hours of unnecessary cartridge swaps.
Streaks, Voids, and Backgrounding
Vertical streaks are often caused by a dirty laser slit glass, a contaminated charge roller, or a damaged doctor blade inside the cartridge.
Horizontal streaks or bands may indicate a failing transfer roller or a worn fuser film.
Voids (missing toner in solid areas) can result from a damaged photoconductor drum, a dirty transfer roller, or poor contact between the drum and developer roller.
Backgrounding, where toner appears lightly over the entire page, is frequently caused by incorrect charge voltage, a worn drum, or high humidity affecting the toner.
All of these symptoms can be misattributed to the cartridge if the technician does not perform a visual inspection of the printer interior and compare the defect to the printer's maintenance history.
- Measure repeat intervals to match to component circumferences.
- Use a clean test page with solid fill and halftone patterns.
- Inspect the printer interior for toner spills or debris before condemning the cartridge.
- Document the exact defect pattern with a photo or scan for supplier warranty claims.
Cartridge-Specific Failure Modes vs. Maintenance Wear Patterns
Although many print quality issues are not cartridge-related, cartridges do fail.
Recognizing the specific failure modes of a cartridge can help differentiate them from printer wear.
Common cartridge failures include chip communication errors, where the printer reports that the cartridge is missing or incompatible even though it is installed correctly.
This can be caused by dirty contacts, a faulty chip, or a firmware mismatch.
Toner leakage is another clear cartridge defect: if toner powder is visible inside the printer or on the cartridge body, the cartridge seal or housing has failed.
A damaged doctor blade inside the cartridge can cause an uneven toner layer on the developer roller, resulting in streaky or grainy prints.
In some cases, the photoconductor drum inside the cartridge (if integrated) may be scratched or worn, producing repeating marks that match the drum circumference.
On the maintenance side, typical printer wear patterns include a worn fuser sleeve that causes poor toner adhesion or smearing, especially on heavier paper.
A dirty corona wire or charge roller can cause vertical streaks or background.
A failing transfer roller can create ghosting or incomplete transfer, where the image appears faint or patchy.
Worn pickup rollers can cause paper jams or skew, which are often blamed on the cartridge because the jam occurs near the cartridge area.
The key difference is that maintenance issues tend to affect all cartridges installed in that printer, while a cartridge-specific defect will follow the cartridge if moved to another machine.
This is the basis for the swap test described in the next section.
Documentation is critical for warranty and supplier returns.
If a cartridge is suspected to be defective, record the printer model, page count, defect description, and photos of the printed output.
Note whether the defect appears immediately after installation or develops after a certain number of pages.
If the cartridge had been working fine and then suddenly started producing defects, a mechanical failure inside the cartridge is plausible.
If the defect has been present across multiple cartridges in the same printer, the cause is almost certainly in the printer.
This evidence protects both the service provider and the cartridge supplier from disputes.
A Field-Tested Triage Protocol for Service Technicians
The following step-by-step protocol can be used by any technician to quickly isolate whether a print defect originates from the cartridge or the printer. It is designed to minimize downtime and avoid unnecessary part replacements. The protocol assumes that the technician has access to a known-good cartridge compatible with the printer model and basic tools for inspection.
- Step 1: Check the environment and printer condition. Look for excessive dust, humidity, or paper debris. Clean the printer interior, especially the transfer roller and paper path.
- Step 2: Print a diagnostic test page. Use a built-in printer test page or a supplier-provided pattern. Note the defect type, location, and repeat interval.
- Step 3: Compare the defect to the printer's maintenance history. Check the page count since last service, and inspect fuser, drum, and transfer components for visible wear.
- Step 4: Perform a swap test. Remove the suspect cartridge and install a known-good cartridge of the same type. If the defect disappears, the original cartridge is faulty. If the defect persists, the problem is in the printer.
- Step 5: If the defect persists, isolate the printer subsystem. For example, if the defect is on the back of the page, check the fuser. If the defect repeats at drum circumference, replace the drum unit (if separate).
- Step 6: Log all findings, including the cartridge serial number, printer page count, and defect photos. Update the service ticket and inform the customer of the root cause.
This protocol works because it uses the cartridge as a diagnostic tool.
By swapping with a known-good unit, the technician can immediately tell whether the problem moves with the cartridge or stays with the printer.
If the defect persists, the cartridge is exonerated, and the focus shifts to the printer.
If the defect disappears, the cartridge is confirmed as the source, and it can be returned for warranty with clear evidence.
The half-test method can also be useful: stop the printer mid-print to see whether the defect appears before or after the fuser.
If the defect is visible on the image before fusing, the problem is before the fuser (drum, transfer, or cartridge).
If it only appears after fusing, the fuser is at fault.
Technicians should be trained to follow this protocol consistently. Over time, they will develop a mental library of defect patterns and solutions, which speeds up diagnosis. Standardizing the process also allows remote support teams to guide customers through basic checks before dispatching a technician, potentially resolving simple issues without a site visit.
Fleet-Level Insights: Using Defect Data to Improve Procurement
Individual service calls produce data that can be aggregated for fleet-wide insights.
By tracking every print quality incident, including the suspected cause and final resolution, service organizations can identify patterns that would otherwise go unnoticed.
For example, if a particular printer model shows a high rate of fuser-related defects, the procurement team can proactively stock fuser kits for that model instead of overstocking cartridges.
Conversely, if a specific cartridge model has an unusually high defect rate across multiple printers, that information can be used to negotiate with the cartridge supplier, request a quality review, or switch to a different compatible toner source.
Data also helps set realistic expectations for cartridge yield.
Some customers complain that a cartridge did not reach its advertised page yield, but the actual cause may be high coverage printing, frequent power cycling, or a printer that is not properly maintained.
By analyzing the printer's page count, coverage rate, and maintenance status alongside the cartridge yield data, service providers can explain discrepancies and avoid false defect returns.
Distributors who supply compatible printer cartridges to mixed fleets can use this data to reassure customers that the cartridge is performing within normal parameters when the printer itself is the limiting factor.
Procurement teams should request defect rate reports from their toner cartridges for distributors or B2B toner cartridge supplier.
A reputable supplier will provide batch-level quality data and be willing to work with the service provider to investigate recurring issues.
This collaborative approach reduces the blame game and focuses on continuous improvement.
Over time, the service organization builds a knowledge base that improves first-time fix rates, reduces unnecessary cartridge consumption, and strengthens its position as a technical advisor rather than just a parts vendor.
Compatible Cartridges in Mixed Fleets: Navigating Compatibility and Firmware
Many B2B fleets operate a mix of OEM and compatible cartridges to control costs.
This practice is generally sound, but it introduces additional variables that can be mistaken for cartridge defects.
The most common issue is firmware compatibility.
Printer manufacturers periodically release firmware updates that can block non-OEM chips or alter the way the printer communicates with the cartridge.
A compatible cartridge that worked perfectly before a firmware update may suddenly trigger error messages such as cartridge not recognized or non-genuine cartridge.
This is not a cartridge defect per se, but a compatibility conflict.
Service technicians must be aware of this possibility before condemning the cartridge or the printer.
Another factor is chip quality.
Compatible cartridges rely on aftermarket chips to communicate page counts, toner levels, and region codes.
A low-quality chip can cause intermittent errors, especially in printers with multiple cartridge slots.
If the chip contacts are dirty or misaligned, the printer may fail to detect the cartridge.
Cleaning the contacts and reseating the cartridge can resolve many of these issues.
However, if the chip is poorly designed, the problem will recur, and the cartridge should be returned to the supplier as defective.
The challenge for the service provider is to determine whether the issue is the chip, the firmware, or the printer's own card reader.
Mixing OEM and compatible cartridges in the same printer model can also cause confusion.
For example, if a printer has one OEM drum and a compatible toner cartridge, and a defect appears, the technician may incorrectly blame the compatible toner because it is the non-OEM component.
In reality, the drum may be worn after heavy use.
A systematic isolation test, using a known-good OEM or compatible cartridge of the same type, helps eliminate bias.
It is also important to verify that the compatible cartridge is the correct regional version and that the printer firmware has not been updated to reject non-OEM chips.
Suppliers who offer compatible toner for mixed printer fleets should provide firmware compatibility matrices and guidance on how to handle updates.
Supplier Evaluation: Choosing Partners That Minimize Misdiagnosis
Not all cartridge suppliers are equal when it comes to supporting accurate diagnostics.
A B2B toner cartridge supplier that simply ships cartridges without technical documentation or responsive support can increase the risk of misdiagnosis.
When evaluating suppliers, service providers should look for partners that provide clear compatibility lists, yield expectations, and troubleshooting guides.
The supplier should be willing to share defect rate data and explain the quality control processes used to ensure batch consistency.
This transparency helps service teams trust the product and avoid blaming the cartridge for every issue.
Another critical factor is the supplier's return policy.
In a maintenance-related failure, the cartridge is not defective, and the supplier should not have to accept a return.
However, when a cartridge is truly faulty, the process should be straightforward.
A supplier that offers a clear distinction between defective and maintenance-related returns, and that provides diagnostic support before a return is initiated, can save the service provider significant time.
Some suppliers offer test cartridges for fleet validation, allowing the service provider to evaluate compatibility and print quality before committing to a volume order.
This is especially valuable when introducing compatible cartridges into a fleet with mixed printer models.
- Request technical data sheets and compatibility tables for each printer model.
- Ask about defect rate statistics and batch traceability.
- Confirm the supplier has a documented return process that distinguishes cartridge defects from printer issues.
- Evaluate the supplier's willingness to provide test samples and diagnostic support.
- Check if the supplier offers firmware compatibility guidance and chip quality assurance.
Building Your Own Diagnostic Checklist for Printer Cartridge Issues
To implement these practices consistently, every service organization should create a standardized diagnostic checklist.
The checklist should be integrated into the service ticketing system or available as a mobile form for technicians in the field.
A well-designed checklist ensures that no steps are skipped, documentation is complete, and the data collected is usable for fleet analysis.
The checklist should include the following elements:
- Customer complaint summary and printer model/serial number
- Current page count and date of last maintenance
- Description and photo of the print defect, including repeat interval measurement
- Inspection results for fuser, drum, transfer roller, and paper path
- Result of swap test with known-good cartridge
- Firmware version and chip contact condition
- Final classification: cartridge defect, printer maintenance, or environmental cause
- Recommended action and parts required
Training technicians to use the checklist is equally important.
A short workshop or on-the-job training session can demonstrate how to measure repeat intervals, perform a half-test, and document findings properly.
The goal is to make the diagnostic process as routine as checking the paper tray.
Once the checklist becomes second nature, first-time fix rates will improve, and unnecessary cartridge returns will drop.
The data collected from the checklists can be reviewed monthly to identify trends and adjust training or procurement strategies accordingly.
Distributors and MPS operators that adopt this systematic approach position themselves as technical experts rather than simple parts suppliers. Customers notice when a service provider can explain exactly why a print defect occurred and what was done to fix it. That trust translates into longer contracts, more referrals, and a healthier bottom line.
FAQ
How can I tell if a print defect is caused by the cartridge or the printer?
The most reliable method is a swap test. Install a known-good cartridge of the same type. If the defect disappears, the original cartridge is faulty. If the defect persists, the problem is in the printer. Additionally, measure the repeat interval of any repeating marks and compare it to component circumferences to locate the source.
What are the most common printer maintenance issues mistaken for cartridge defects?
Worn fuser units, dirty or damaged transfer rollers, contaminated charge rollers, dirty laser optics, and worn pickup rollers are frequently blamed on cartridges. These components cause streaks, smears, ghosting, backgrounding, and jams that can appear to be toner-related. Regular printer maintenance can prevent many of these issues.
Should I replace the cartridge first when a customer reports poor print quality?
No. Replacing the cartridge first is a common mistake that wastes time and money. Always print a test page and inspect the printer interior before changing the cartridge. If the printer has been serviced recently and the defect pattern matches a maintenance component, address that first. The swap test is a better diagnostic step than blind replacement.
How do compatible cartridges affect print defect diagnosis compared to OEM?
Compatible cartridges can sometimes introduce chip or firmware compatibility issues that are not present with OEM.
What information should I collect before requesting a cartridge warranty replacement?
Collect the printer model and serial number, page count at time of failure, a description and photo of the defect, the repeat interval measurement, and the result of a swap test. Also note the firmware version and whether the cartridge chip contacts were clean. This evidence helps the supplier validate the claim and prevents returns being rejected as maintenance-related.
Conclusion
Separating cartridge defects from printer maintenance problems is not an art; it is a discipline.
By training technicians to read print defects, perform swap tests, and follow a standardized triage protocol, B2B service providers can dramatically reduce wasted cartridges, cut repeat service calls, and improve customer satisfaction.
The data collected from these diagnostics becomes a strategic asset for procurement, enabling smarter buying decisions and stronger supplier partnerships.
For distributors and MPS operators, the ability to accurately diagnose the root cause of print quality issues is a competitive advantage.
It transforms the service team from part swappers into trusted advisors.
Customers appreciate vendors who solve the problem the first time, and they reward that reliability with loyalty.
Start by implementing a simple checklist and training your technicians to use it consistently.
The savings in time, money, and frustration will be immediate and compounding.
Finally, choose cartridge suppliers who support your diagnostic efforts with quality products, transparent data, and responsive technical help.
A good B2B toner cartridge supplier should be a partner in reducing misdiagnosis, not just a source of boxes.
With the right combination of disciplined diagnostics and reliable supply, your fleet maintenance operation can achieve higher first-time fix rates and lower total cost of ownership.