
For B2B distributors and managed print service providers, the cost of a misdiagnosed print quality complaint goes far beyond a returned toner cartridge.
Every uncertain service call, every needless on-site visit, and every unresolved customer ticket chips away at margin and trust.
Without a shared visual reference, 'bad print quality' means something different to each technician, each customer, and each supplier.
A defect photo library turns that subjective noise into an objective asset.
The hidden cost of unresolved print quality complaints often appears as increased labor, repeat service visits, and customer churn that erodes account profitability.
The core problem is simple: toner-related defects and printer hardware failures often produce similar-looking marks on paper.
A vertical streak might come from a worn drum, a damaged developer roller, or a batch of toner with poor particle distribution.
Without side-by-side examples and consistent documentation, even experienced technicians guess.
That guessing leads to unnecessary cartridge replacements, wasted inventory, and unresolved root causes.
By building a structured photo library, you create a common language for quality. It becomes a training tool for new staff, a diagnostic aid for remote support, and a negotiation asset when discussing batch consistency with toner suppliers. Most importantly, it shifts the conversation from opinion to evidence. That shift is the foundation of a professional toner quality control program.
Defining Print Defect Categories: Toner vs. Printer Issues
The first step in building a useful library is to classify defects in a way that separates potential toner causes from printer hardware problems. A loose list of 'lines and spots' will not survive contact with a mixed printer fleet. Instead, you need a short, memorable taxonomy that technicians can apply in the field without a manual.
Typical toner-related defects include background scatter, low density or faded output, uneven fill across large solid areas, toner spots or comets, and cartridge-specific repeating marks that do not follow the drum circumference.
Printer-related defects often appear as repetitive marks at fixed intervals, fuser offset or smearing, paper path scratches, or charge roller defects that produce a consistent pattern regardless of toner batch.
To make this distinction practical, create a simple decision tree.
Ask three questions: Is the defect position consistent across multiple pages?
Does the defect disappear when a known good toner cartridge is installed?
Is the defect interval linked to a specific rotating component?
Those three answers will usually point to the right subsystem.
The photo library should include examples of both toner-caused and printer-caused defects, clearly labeled, so technicians learn to separate them quickly.
A strong library also includes borderline cases. For example, ghosting can be caused by a toner that does not charge properly, by a worn drum, or by a fuser temperature issue. By collecting multiple images of ghosting with different root causes, you build a diagnostic reference that improves first-time fix rates across your fleet.
Standardizing Test Pages and Capture Conditions
Reliable defect photos require more than a smartphone pointed at a printed page. If lighting, angle, or test page design varies from one photo to the next, the library loses its value as a comparison tool. Standardization is not bureaucratic overhead; it is what makes the library trustworthy.
Start with a fixed set of test pages.
A full-page solid black or solid color page highlights density variation, background scatter, and vertical streaks.
A halftone page reveals banding and uneven development.
A text page exposes character edge quality and toner spatter.
A gray scale or gradient page catches abrupt density jumps caused by toner feed problems.
Keep the same set of test pages for every photo, and print them on the same type of paper if possible.
Lighting and capture angle must also be controlled.
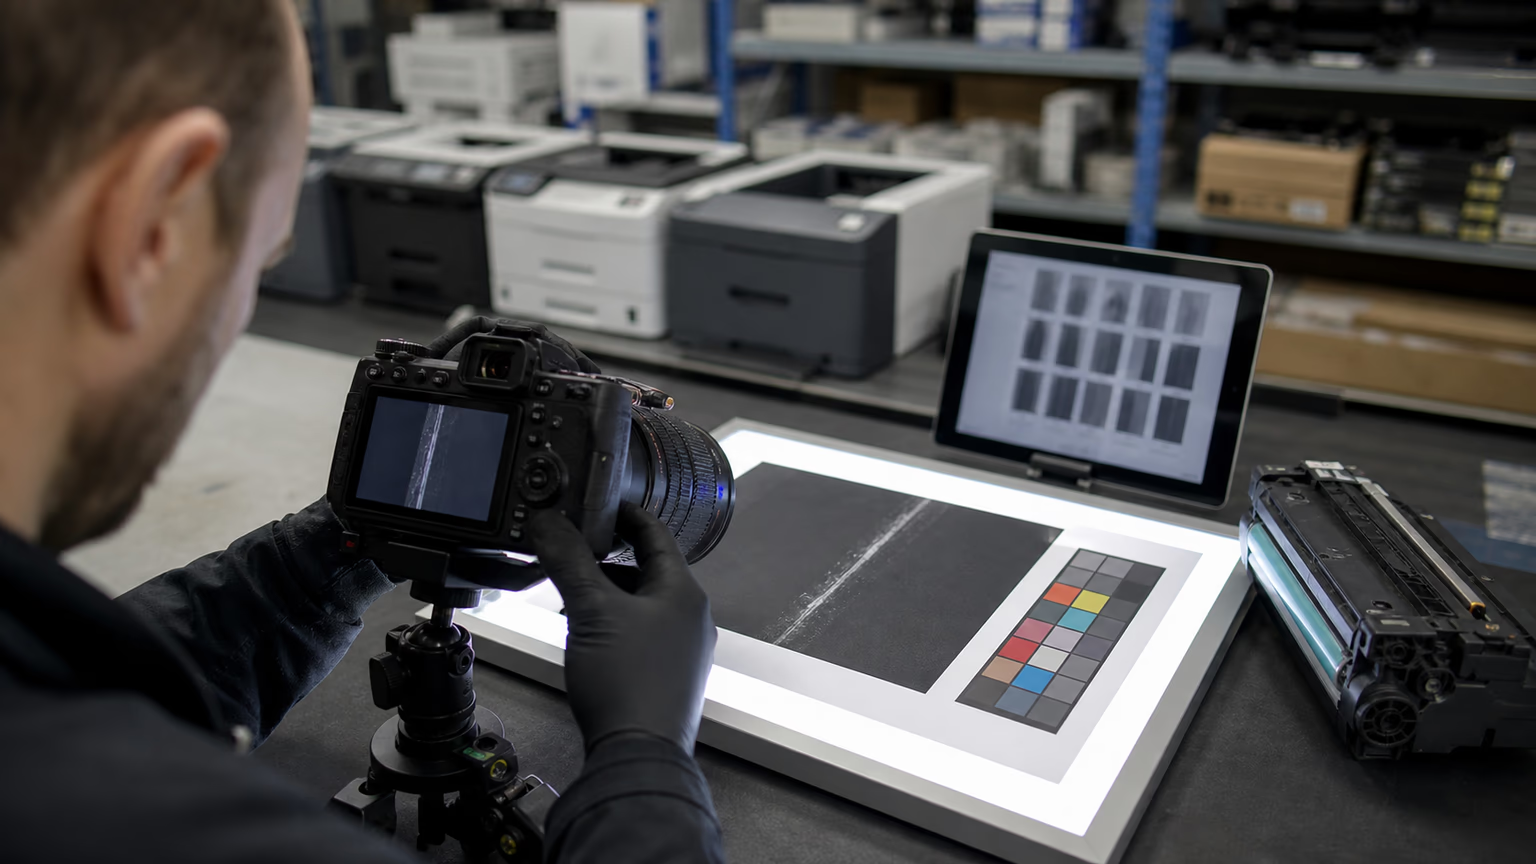
Use a lightbox or a fixed station with even, color-accurate lighting.
Place the test page flat, either on a neutral background or inside the lightbox.
Use a camera or smartphone on a small tripod, positioned directly above the page at a consistent height.
Include a color calibration card and a small ruler or scale marker in the frame.
Those simple additions help you compare defect size and color across different photos and batches.
For storage, set a minimum resolution. A photo with less than 1200 pixels on the long side may not show fine toner particles or subtle streaks. Save images in a standard format such as JPEG at a quality setting that balances file size and detail. If you use smartphone cameras, lock exposure and white balance before shooting to avoid auto-adjustments that change the appearance of the defect.
Building the Library: Metadata, Storage, and Accessibility
A photo without metadata is just a picture.
To make the library searchable and useful, each image must carry the same set of information.
At a minimum, capture the toner cartridge model, the batch or lot number, the printer model, the page count at the time of the defect, the date, and the defect category.
Add optional fields such as the test page type, the environment temperature and humidity, and the technician name.
The metadata can be stored in the file name, in a spreadsheet, or in a dedicated digital asset management system.
The best choice depends on your organization size.
For a small service team, a shared cloud folder with a strict naming convention may be enough.
For a larger distributor managing hundreds of SKUs across multiple clients, a searchable database integrated with your service ticketing system is far more effective.
Cloud storage has the advantage of immediate access from the field. Technicians can upload photos from their phones and attach them to a service ticket in seconds. Local servers offer more control over data privacy but require VPN access for remote teams. Many organizations start with a shared drive and move to a database once the library grows beyond a few hundred images.
To keep the library usable, define a simple folder structure. For example:
- Root folder by defect category: streaks, spots, ghosting, background, density, fusing, color registration
- Subfolder by printer model or engine family, not by toner brand
- File name pattern: defect type_printer model_batch number_date
- A master index spreadsheet that links each photo to its metadata
Searchability is the point. If a technician cannot find a relevant example in under two minutes, the library has failed. Include tags and filters that allow searching by symptom, by cartridge model, or by supplier.
Using the Library for Supplier Evaluation and Batch Quality Control
A defect photo library is not just a service tool; it is a procurement asset. When you have a documented history of toner-related defects, you can compare suppliers and batches with hard evidence instead of memory or anecdote. That evidence changes the nature of supplier conversations.
Start by tracking defect frequency per batch.
If one supplier's batch shows a higher rate of background scatter or ghosting, that data becomes the basis for a quality discussion.
Share the specific photos with the supplier, along with the batch number and printer models involved.
A professional supplier will respond with either a process correction or a credit.
A defensive supplier reveals their true approach to quality.
Use the library to set objective acceptance criteria for incoming toner shipments.
Before accepting a new batch, pull a statistically meaningful sample of cartridges from the shipment, run the standard test pages, and compare the resulting photos to your library's reference images.
If the defect signature matches a known problematic pattern, you can quarantine the batch early and avoid widespread customer complaints.
Over time, this data feeds supplier scorecards. You can rate suppliers on batch-to-batch consistency, defect severity, and responsiveness to quality complaints. These scorecards become a rational basis for supplier selection, negotiation, and even volume allocation across your toner cartridges for distributors business.
Training Technicians and Support Teams with Defect Examples
The fastest way to reduce service callbacks is to give your technicians a visual pattern memory. New technicians can study the library during onboarding and learn the difference between a toner streak and a drum scratch before they ever touch a customer machine. That reduces the learning curve and prevents common misdiagnoses.
For remote support, the library enables a simple workflow.
Ask the customer to take a photo of the defective page with their smartphone, following a short instruction sheet that you provide.
The support agent then compares that photo to the library to narrow down the likely cause.
In many cases, this remote triage eliminates the need for an on-site visit, because the correct replacement part or toner cartridge can be shipped directly.
To make remote diagnosis reliable, include a few reference photos in your customer-facing communication. Show what a proper photo looks like: the full page, one close-up of the defect, and a small area of the page without the defect. A clear customer photo dramatically improves the match rate against your library.
The library also becomes a knowledge base for recurring issues. If a particular printer model paired with a certain toner batch consistently produces a specific defect, that pattern will emerge from the library search results. Documenting that pattern saves hours of re-diagnosis for every new ticket.
Integrating the Library into Mixed Fleet and MPS Workflows
Mixed printer fleets are the reality for most managed print service providers. You cannot rely on one OEM engine's defect patterns when you support dozens of models from multiple manufacturers. A defect photo library must be organized around printer engine behavior, not just toner brand.
Each printer family has its own fusing temperature, drum design, and developer system.
A compatible toner that works perfectly in one engine may produce background scatter in another due to different charge requirements.
By collecting defect photos across the fleet, you can document those compatibility boundaries and select toner formulations that perform adequately across the widest range of engines.
This cross-reference also supports proactive fleet health monitoring. If a new batch of compatible toner for mixed printer fleets triggers an unusual number of photos in a specific defect category, you can alert your service team and proactively inspect other machines using that batch. That early warning prevents a single bad batch from becoming a fleet-wide service event.
For MPS clients, sharing selected library examples demonstrates control and professionalism. When a client asks why print quality declined, you can show the before-and-after photo evidence from your quality records, along with the corrective action taken. That builds confidence and reduces churn.
Next Steps: Starting Small and Scaling Your Defect Library
You do not need to build a comprehensive library overnight. Start with the five most frequent defect categories that drive your service calls and returns. Typically, that means vertical streaks, background scatter, ghosting, low density, and spots. Create a simple folder structure, define the test pages, and capture the first fifty photos using your own technicians and most common printer models.
Assign a champion inside your organization to own the library. That person reviews every incoming photo for consistency, corrects metadata errors, and ensures that new examples are added to the right category. Without a named owner, the library quickly becomes a disorganized pile of images that no one trusts.
Then scale gradually. Add new defect categories as you encounter them. Expand metadata fields to include supplier name and fill level. Link the photo library to your service ticketing system so that every technician can search it from the field. Every quarter, review the library with your service management and purchasing teams to identify trends and adjust supplier scorecards.
Finally, use the library as a live document, not a static archive. When a new defect appears, add it. When a supplier changes their toner formulation, retest and update reference images. The value of the library grows with every well-captured photo, because each image captures knowledge that would otherwise be lost when a technician leaves or a service call ends.
FAQ
How do I categorize print defects for toner quality control?
Start with a simple taxonomy based on visual appearance: streaks, spots, ghosting, background scatter, density variation, and fusing defects.
What equipment do I need to build a print defect photo library?
You need a consistent set of test pages, a lightbox or well-controlled lighting area, a camera or smartphone with manual exposure and white balance, a tripod, a color calibration card, and a small ruler. A shared cloud folder or a ticketing system with photo attachment provides storage and search. No specialized laboratory equipment is required to begin.
Can I use smartphone photos for the defect library?
Yes, smartphone photos are acceptable if you lock exposure and white balance, use a tripod, and follow the same test page and lighting setup each time. Ensure the resolution is high enough to show fine toner particles. Inconsistent framing or automatic adjustments will reduce the library's value, so train technicians on a short standard procedure.
How can a photo library help with supplier negotiations?
A photo library provides objective, timestamped evidence of toner-related defects linked to specific batches and printer models. Instead of subjective complaints, you can show suppliers the exact visual defect and its frequency. That evidence supports requests for credit, process correction, or batch replacement, and it feeds into supplier scorecards for long-term performance review.
What are the most common toner-related print defects?
The most common toner-related print defects include vertical streaks from contaminated developer or damaged components, background scatter from poor toner charge, low density from underfilled or incorrect toner formulation, ghosting from improper fusing or charge retention, and spots or comets from clumps in the toner.
Conclusion
A print defect photo library is not a luxury project for large distributors. It is a practical, low-cost discipline that reduces misdiagnosis, protects margin, and strengthens supplier accountability. By standardizing how you capture, classify, and store defect images, you turn individual complaints into a valuable quality data asset.
Start small, enforce consistency, and link the library to your daily service and procurement workflows. The result is a more professional operation that resolves print quality issues faster, negotiates with confidence, and manages mixed printer fleets with evidence instead of guesswork.